Getting Started
Whether you are a developer or an end-user, this page will help you get started with the octree-creation-app.
Installation
Install Conda
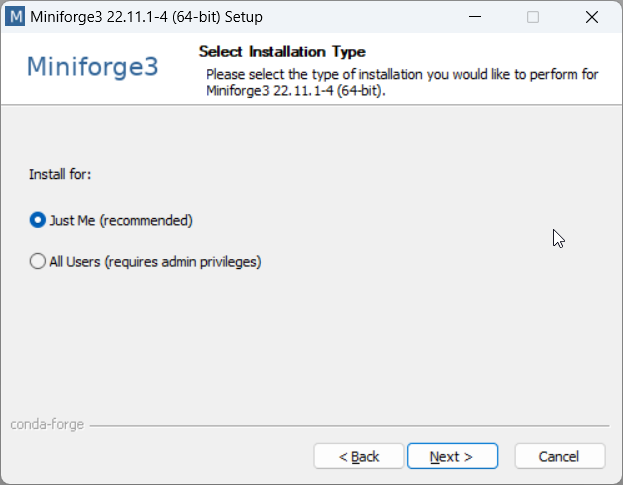
Install Conda for Python 3.10 or higher. Follow this link to download its Windows installer (~140 MB of disk space):


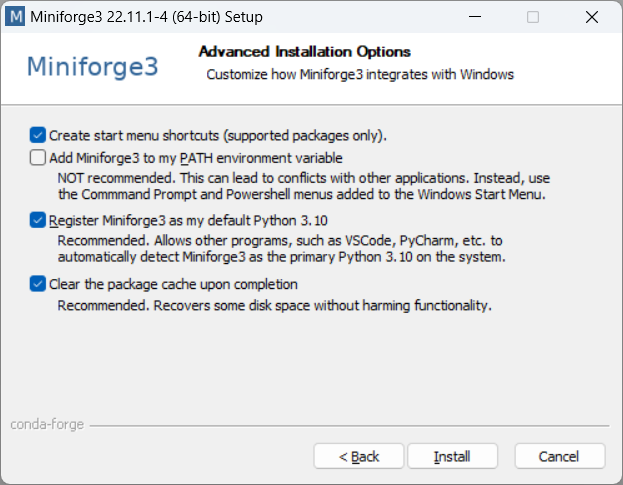
Registering the Conda distribution as the default Python 3.10 interpreter is optional. Preferably uncheck that box if you already have Python 3 installed on your system.
Note
We recommend installing Miniforge: beyond being smaller, it also installs packages from the conda-forge repository by default, which has no restriction for commercial use, while both Miniconda and Anaconda distributions use the Anaconda repository by default: see Anaconda Terms of Service for details. In any case, the installation of octree-creation forces the usage of the conda-forge repository, and is thus not affected by the Anaconda Terms of Service.
Download the latest octree-creation
Follow this link to download from the GitHub repository.
Extract the package to your drive (SSD if available)
Extract the package to your drive, preferably an SSD if available.

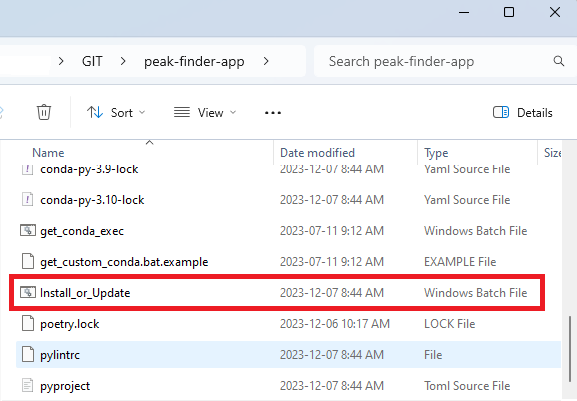
Run Install_or_Update.bat
The same batch file can be used to install or update octree-creation.
A conda environment named octree-creation will be created to prevent conflicts with other software that may rely on Python.

Note
The assumption is made that Conda has been installed in one of the default directories, depending on the distribution (miniforge3, mambaforge, miniconda3, anaconda3):
%LOCALAPPDATA%\
%USERPROFILE%\
%LOCALAPPDATA%\Continuum\
%PROGRAMDATA%\
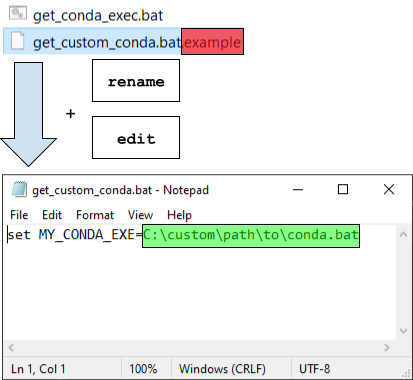
If Conda gets installed in a different directory, users will need to add/edit a
get_custom_conda.bat file to add their custom path to the conda.bat file:

At this point, you will have all required packages to run the applications. See the Basic usage section for more details.